
How to brand the Client Portal Login Page #
In this video you’ll learn how and where to add in your branding elements to the Client Portal Login.
Step-by-Step Guide to Branding Your Client Portal #
This guide will walk you through customizing the branding of your client portal.
Note: This platform may offer more customization options in the future.
Step 1: Accessing Your Branding Settings
- Open your client portal.
- Navigate to the “Branding” section. (The specific location may vary depending on your platform).
Step 2: Customize Your Portal Name
- Locate the field labeled “Name” or similar. This will determine the text displayed at the top of your portal.
- Enter a clear and concise name for your portal. (Character limitations may apply).
Step 3: Update Portal Description (Optional)
- Locate the field labeled “Description” or similar. This text may appear below the portal name.
- Consider removing the pre-filled text and replacing it with a more specific description of your portal’s offerings.
Step 4: Choose Your Brand Colors
- Identify the fields labeled “Brand Color 1” and “Brand Color 2.”
- Select colors that represent your brand identity. (Consult your brand guidelines if available).
- Brand Color 1: This might be used for buttons or other elements within the portal.
- Brand Color 2: The functionality of this color may vary depending on the platform.
- Preview your color choices to ensure they display well together.
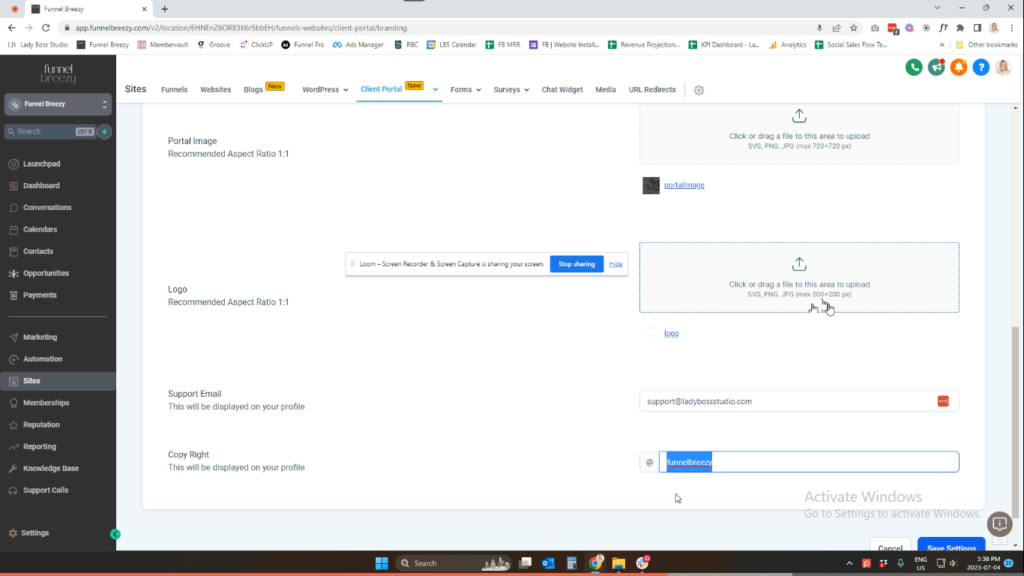
Step 5: Upload Your Favicon and Portal Image
- Locate the field labeled “Favicon.”
- Upload a square version of your logo to be used as the favicon (the small icon displayed in the browser tab).
- Locate the field labeled “Portal Image” or similar.
- Upload a background image for your portal login screen. (Consider using a contrasting image for optimal text readability).
Step 6: Add Your Logo and Support Email
- Locate the field labeled “Logo” or similar.
- Upload your main logo or an alternate logo that displays well in a square format. (Consider using a white or light-colored logo for dark backgrounds).
- Locate the field labeled “Support Email” or similar.
- Enter the email address for client support inquiries.
Step 7: Update Copyright Information (Optional)
- Locate the field labeled “Copyright” or similar. (You may choose to update this with your company’s copyright information).
Step 8: Save Your Changes
Once you’re satisfied with your branding customizations, save your changes within the platform.


